I’ll be sharing my everyday ART WORK on this blog: Posts will include plant-based eating, healthy cooking, contemporary quilting, gardening, photography and tennis playing. Thank you for joining me on this journey.
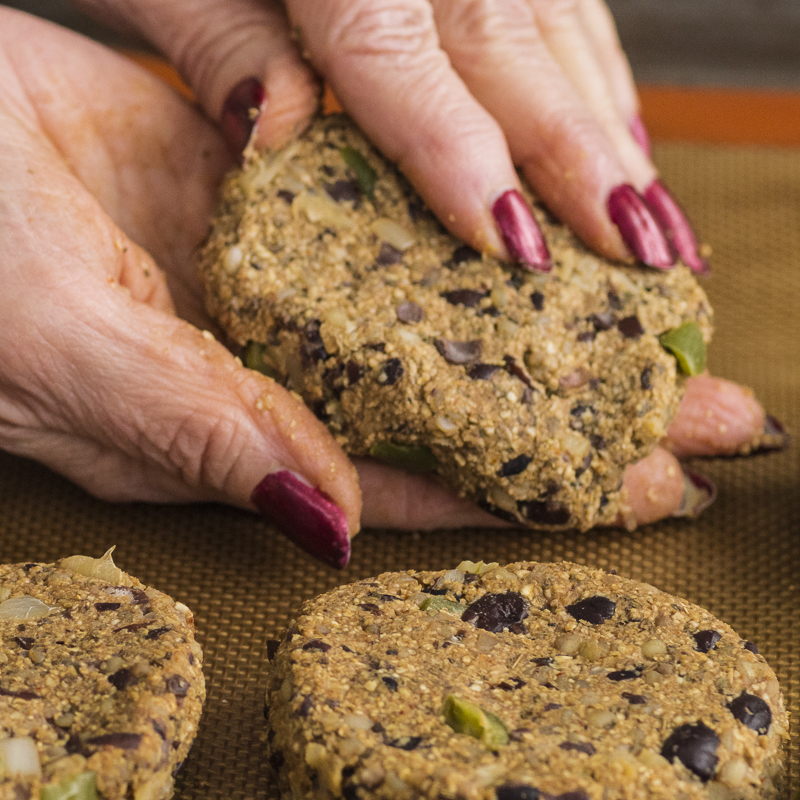
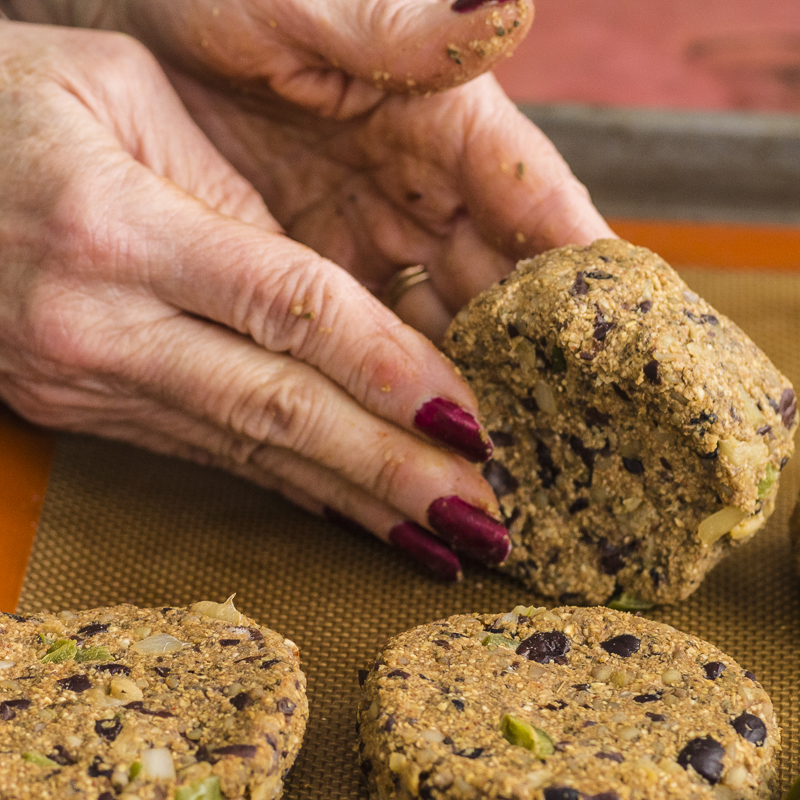
When people see my veggie burgers inevitably they mention how nicely shaped the burgers are and they want to know how to make similarly shaped burgers. Somewhere along the line, I forget where, I learned the following method which I’m showing pictorially. I know, it would be nice if Tom made a video but time is running short here and editing Tom’s videos is very time consuming. So this is what you get tonight…
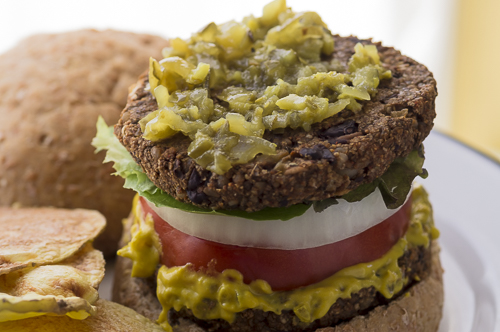
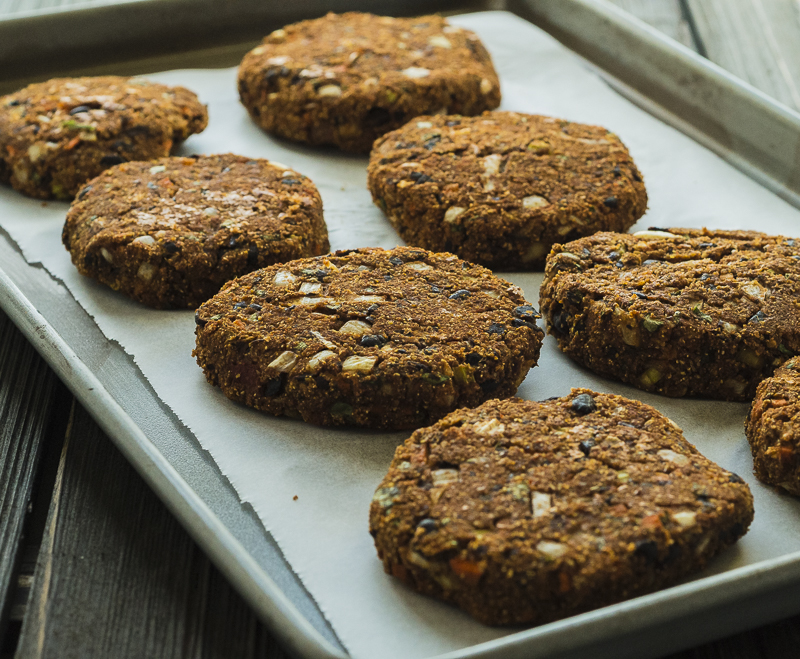
VEGGIE BURGERS: Baked veggie burgers, ready to eat or freeze!
My tips to make a nicely shaped veggie burger: After mixing the ingredients, roughly divide the mix into similar sizes depending on the number of burgers you’re making. For each burger, roll the mix around and around in the palms of your hands, shape doesn’t have to be perfect.
The next steps are shown and explained in these images and captions:
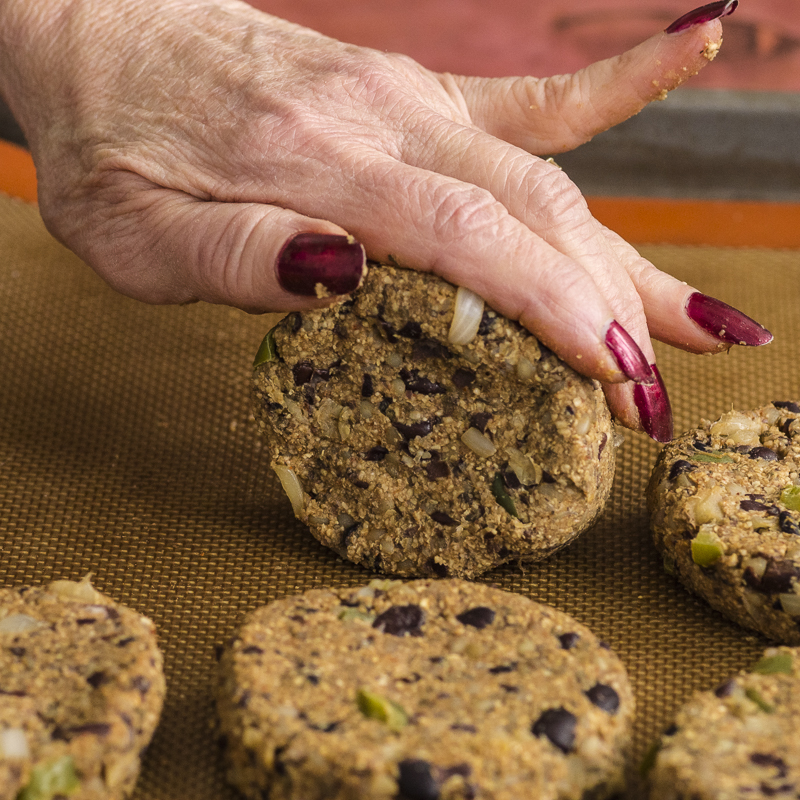
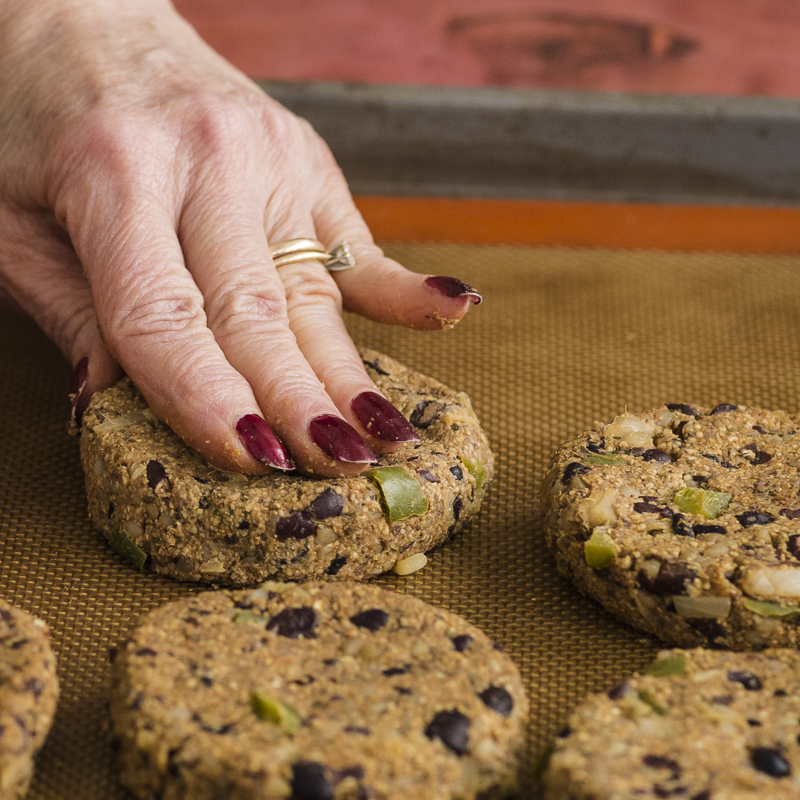
MAKING BUCKWHEAT GROATS and BLACK BEAN BURGER #1: With the palm of your hands, roll the burger mix into a round shape. Then flatten a bit in the palms of your hands. Next and very important, use your thumbs to flatten out the outside edges of the burger by moving the burger around in a circular motions, around and around, until the edges are smooth.MAKING BUCKWHEAT GROATS and BLACK BEAN BURGER #2: Set the edge of the burger on the Silpat or parchment paper.MAKING BUCKWHEAT GROATS and BLACK BEAN BURGER #3: For this step, roll the edge of the burger back and forth on the Silpat until the edge is flat and smooth.MAKING BUCKWHEAT GROATS and BLACK BEAN BURGER #4: This step is the last step – flattening. With your finger tips, mash the burger to make it the thickness that you like.
That’s IT, easy!
You can use this method on any plant-based recipes. Delicious whole food, plant-based burgers are created to be firm, keep their shape after baking and they don’t fall apart!
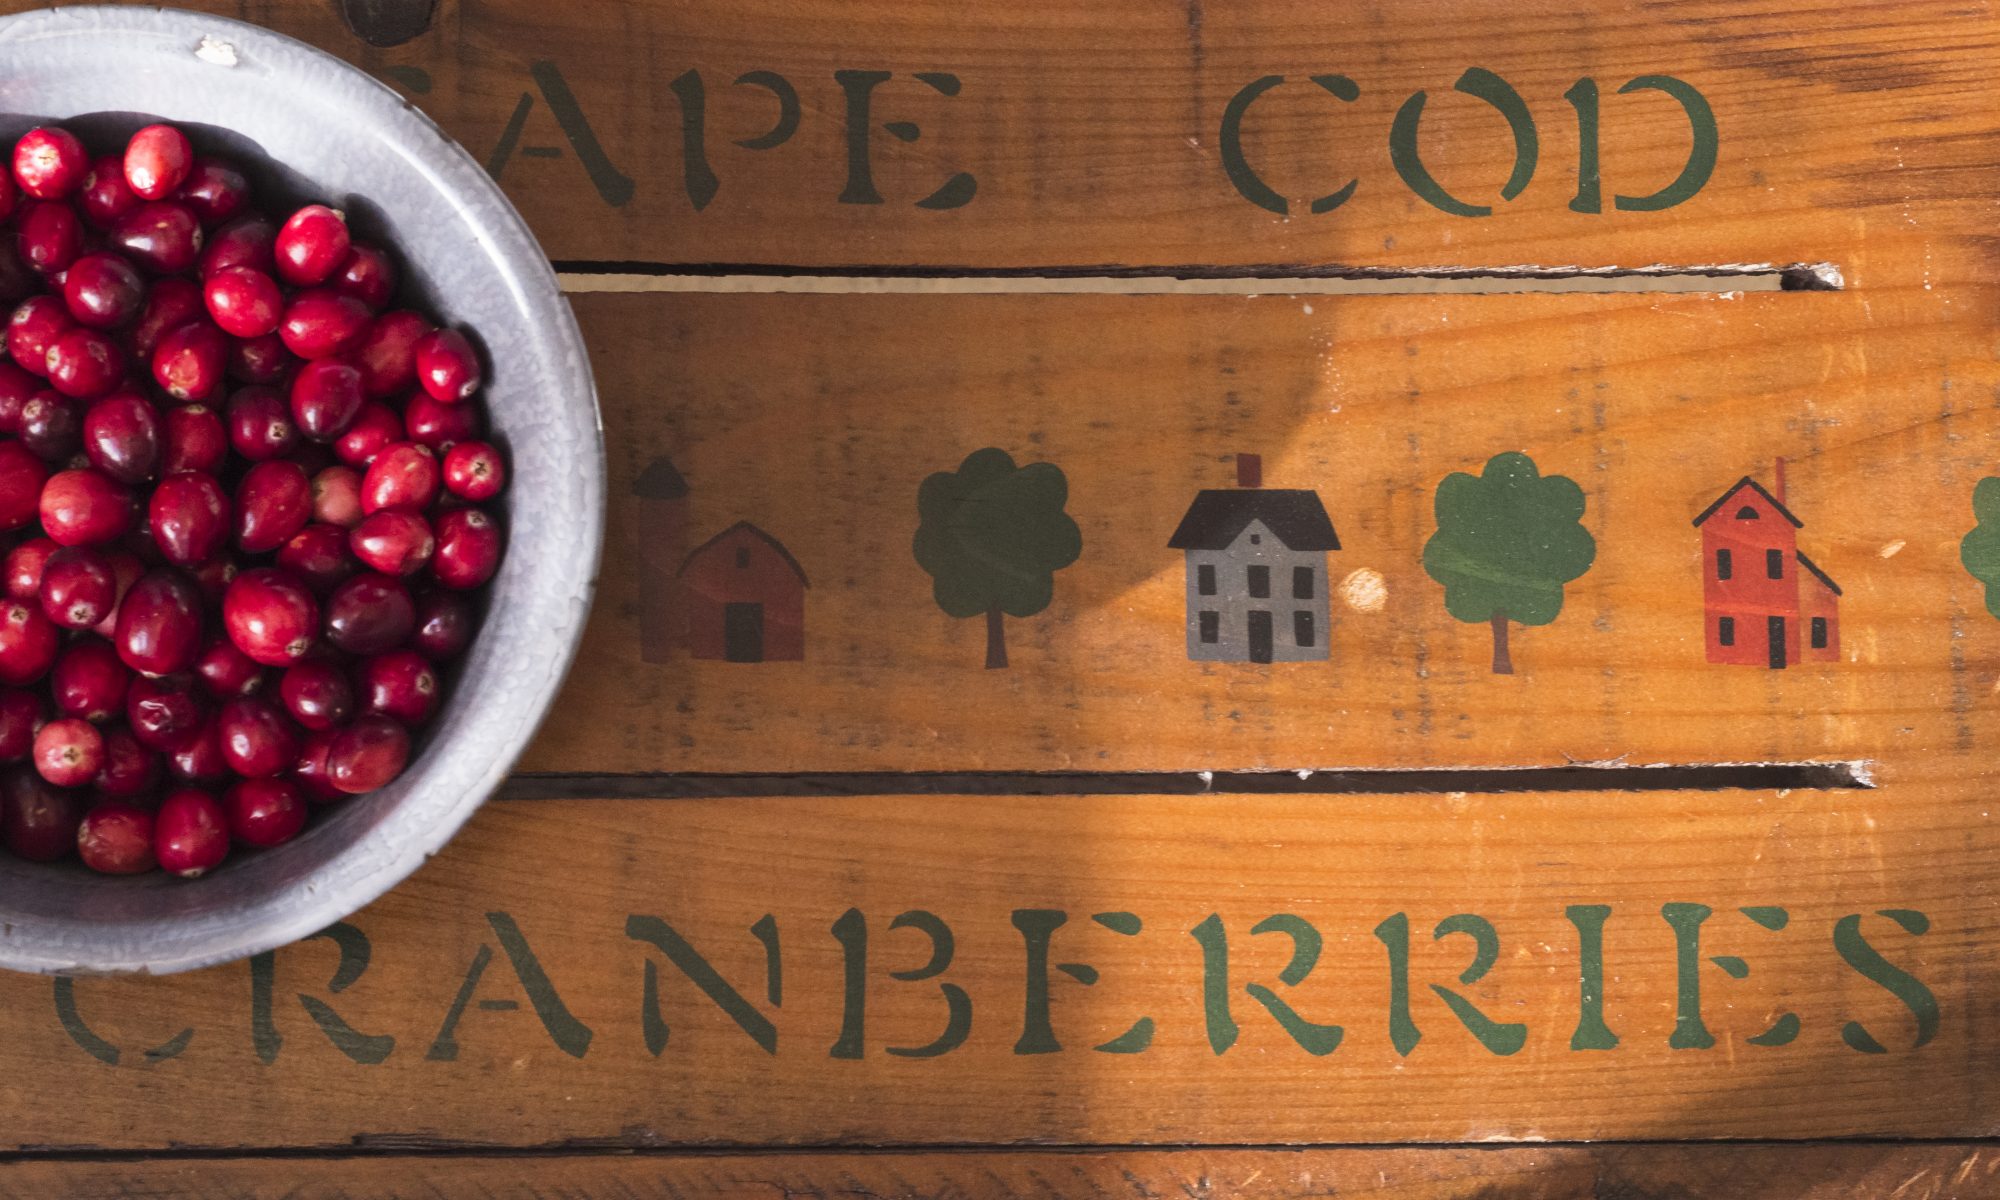
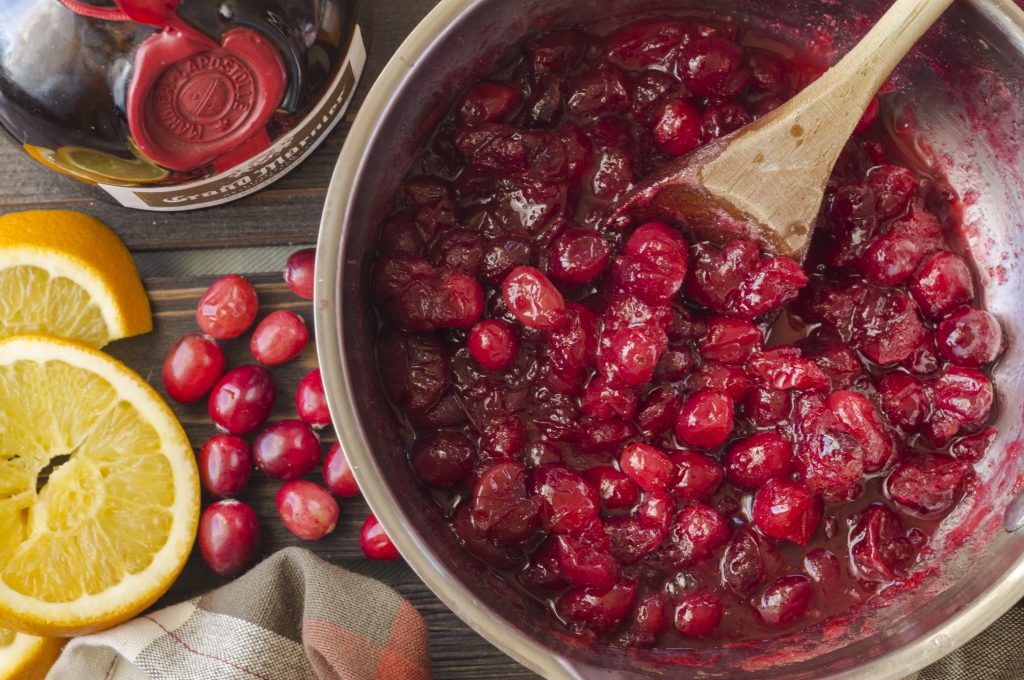
‘Tis the season for wonderful, healthy Cranberries – fresh from Maine. The raw berries are bitter-tasting but full of powerful antioxidants. I will add some unprocessed sugar and orange flavoring to make a tasty syrup to use in healthy plant-based baking. The cranberries will gel from their natural pectin, causing the sauce to thicken. The color and texture of the cranberry syrup is stunning, the translucent berries are especially captivating for a photographer.
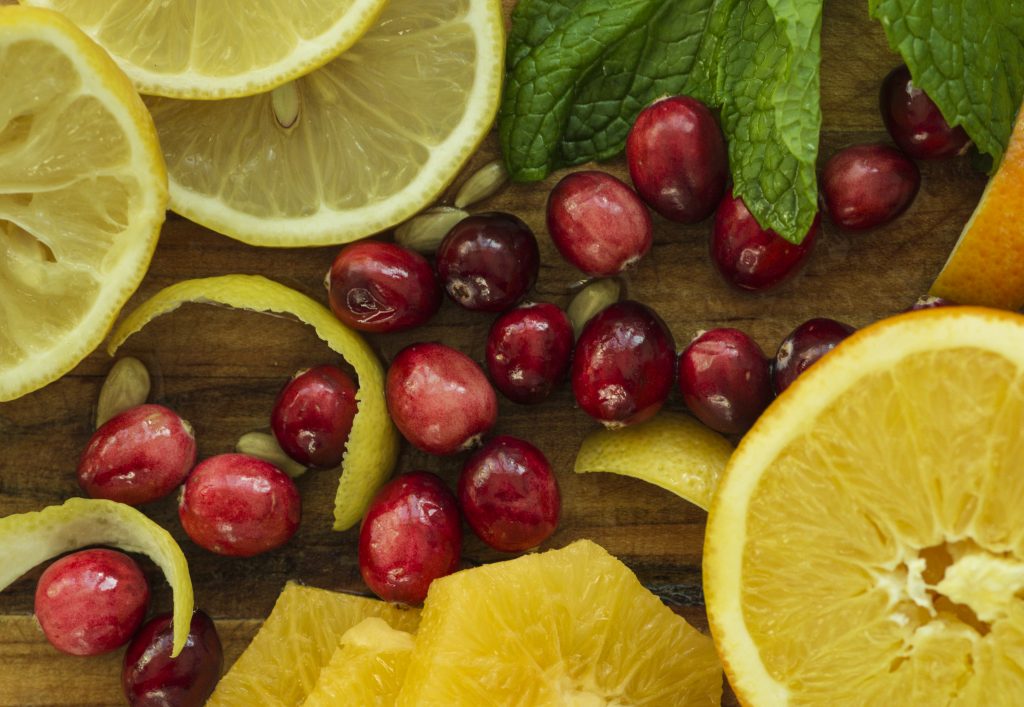
CITRUS: Oranges, lemons and cranberries.
SIMPLE CRANBERRY SAUCE RECIPE (to be used in desserts):
Quantity: After cooking, makes about 1 cup sauce.
2 cups raw cranberries, wash and sort
1/3 cup sugar-in-the-raw type sweetener (or to taste)
1/3 cup orange juice (fresh squeezed or 100% juice)
1 Tablespoon Grand Marnier (orange-flavored liqueur)
****************
So easy to make Cranberry Sauce: Add sugar, orange juice and Grand Marnier to a small skillet. Stir and heat until sugar dissolves. Add raw cranberries, stir gently, bring to a boil. Simmer for 10 minutes, stirring occasionally. Some of the berries will pop. Don’t over stir or over cook, leave some berries whole.
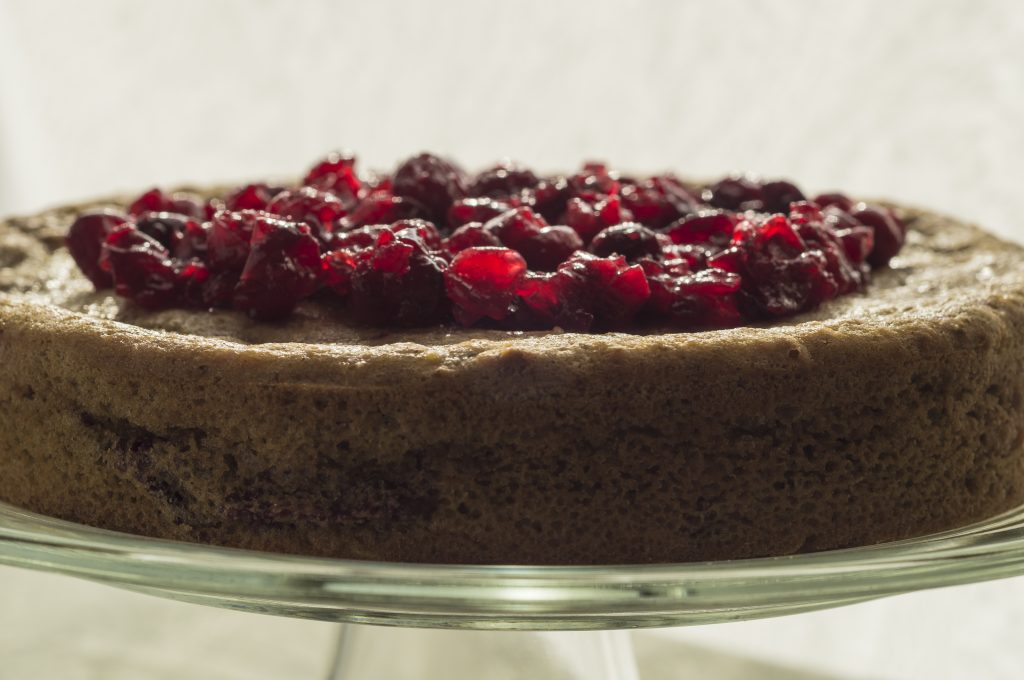
CRANBERRY SYRUP: This syrup is made from fresh cranberries and can be used in cakes or other baked goods.
ORANGE – CRANBERRY FLAVORED CAKE: Fresh cranberries add a seasonal touch to this orange flavored moist cake.ORANGE – CRANBERRY CAKE: My Orange Cake with fresh cranberry sauce turns into a delightful holiday dessert.
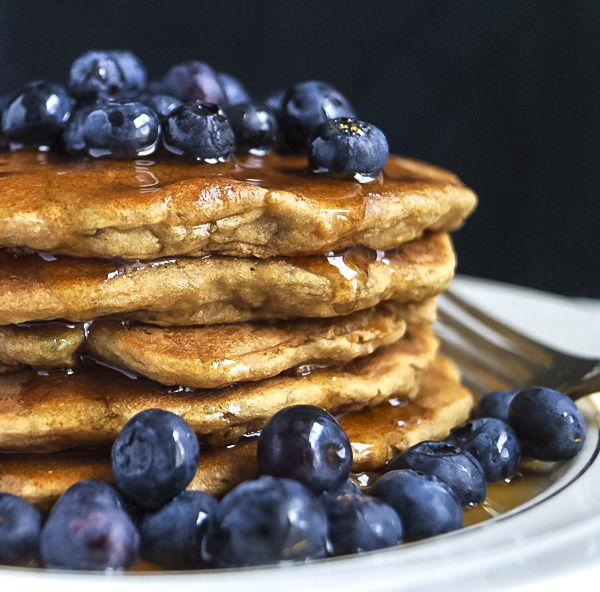
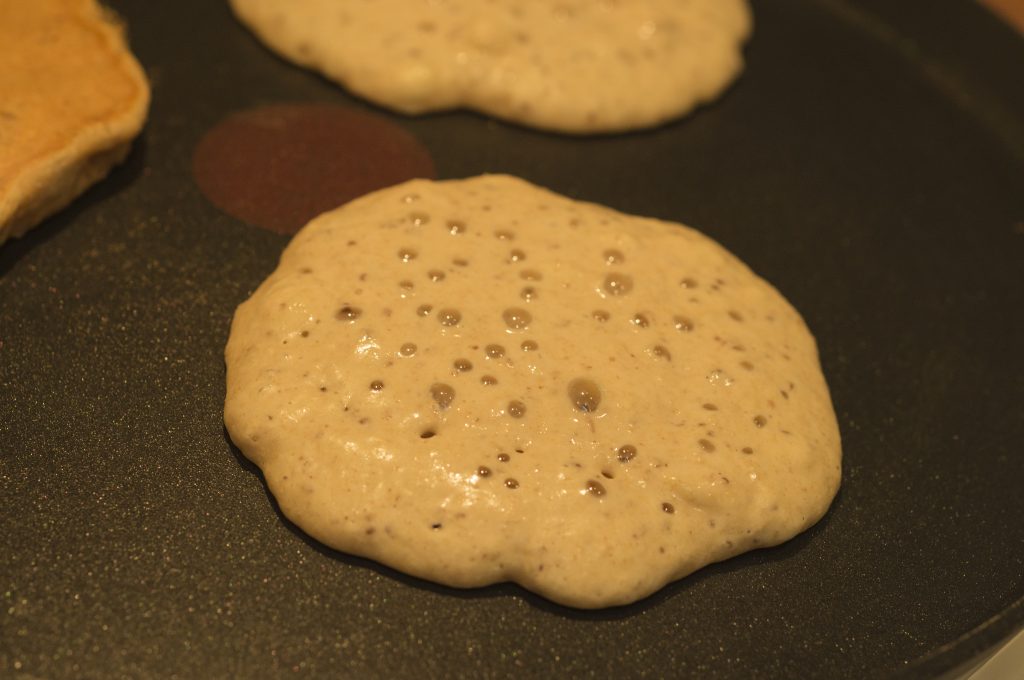
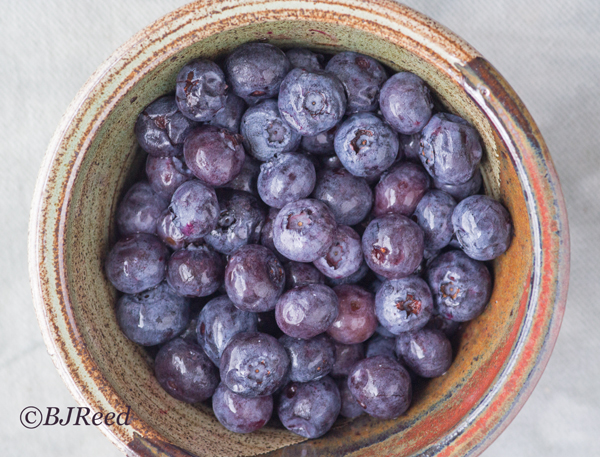
Tom makes beautiful plant-based blueberry pancakes once in awhile on a Saturday morning. I am truly thankful for his cooking skills. These pancakes are made from whole foods – light and sooo tasty with an added benefit of being nutritious. Top with blueberries or your favorite fruit and nuts. Add a small amount of maple syrup, however not quite as much as pictured in my iconic pancake image…haha!
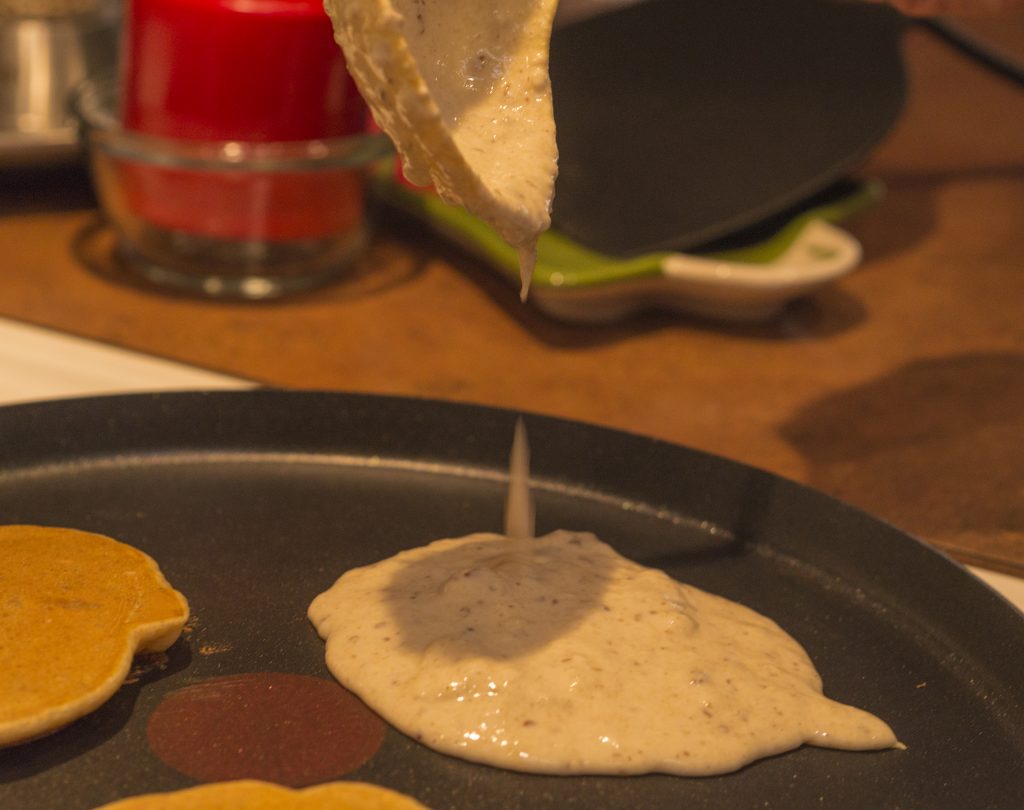
PANCAKES ON THE GRIDDLE: Pour a spoonful of batter on the hot griddle.PANCAKES ON THE GRIDDLE: Cook pancakes until bubbly on top, then turn over.FRESH BLUEBERRIESMAPLE SYRUP: Beautiful highlights from maple syrup.BLUEBERRY PANCAKES
Are you getting hungry yet! Oh one more thing, Tom makes steamed yellow potatoes and onions to go along with the pancakes.
BREAKFAST POTATOES: Yellow potatoes and onions sauteed and steamed.
What a Saturday morning treat!
BASIC PANCAKE RECIPE
These pancakes will get your day off to a good start!
Serves 4
1/2 cup (less 3 tablespoons) white whole wheat flour
1/2 cup whole wheat pastry flour
3 tablespoons arrowroot
1/2 teaspoon baking soda
1 teaspoon vanilla extract
1 cup almond milk
1 whole banana preferably ripe, mash
1 tablespoon flax seed meal
1/4 cup aqua faba (garbanzo beans brine)
2 tablespoons raisins
Optional: Add nuts and/or fruit to the batter or use as toppings
In a medium bowl, mash the banana with a fork, then add all other ingredients. Mix these ingredients until thoroughly combined, do not over mix. Let the batter settle for about 10 minutes. Heat a non-stick skillet on medium-high until droplets of water bounce on the skillet surface. Add batter to hot skillet and when bubbles appear on top of the batter, flip the pancake over to complete cooking. About 60 seconds per pancake.
Nutritional Facts: Per Serving, 189 Calories From Fat 19, Total Fat 4g, Saturated Fat 0g, Cholesterol 0mg, Sodium 166mg, Total Carbohydrate 37g, Dietary Fiber 5g, Sugars 8g, Protein 4g
Try making these easy pancakes, see if you love them as much as we do. HAVE A GOOD DAY!
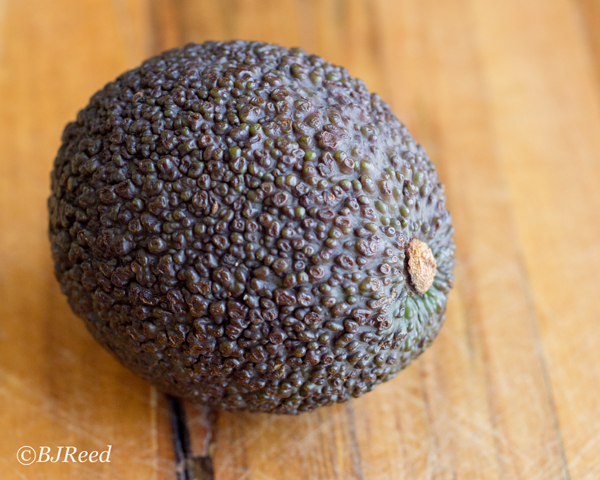
We love avocados…here are a few tips which, hopefully, help you select and preserve left overs.
How to tell if an avocado is ripe:
If you gently squeeze the avocado, the skin should give just a little. Another method is to remove the brown stem and check the color underneath: If the color is yellow it is not yet ripe – if it is GREEN it is ripe and ready to eat – but if it is brown it is over ripe.
How to preserve left over avocados:
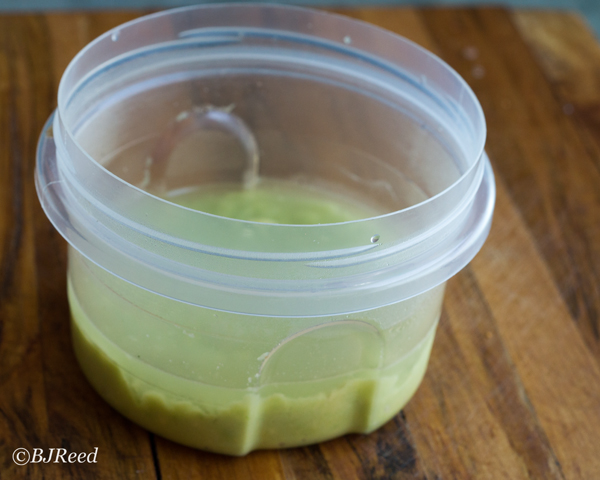
I have tried numerous tips to keep avocados from turning brown after being cut and exposed to air. When air hits the avocado, it turns brown in a short time…not too appealing. So what to do to extend the life? Without much success I’ve tried leaving the pit in, wrapping in plastic, placing an onion with the avocado in a plastic bag and who knows how many other tips. UNTIL…yes one more try, using water to keep the air from the avocado worked!
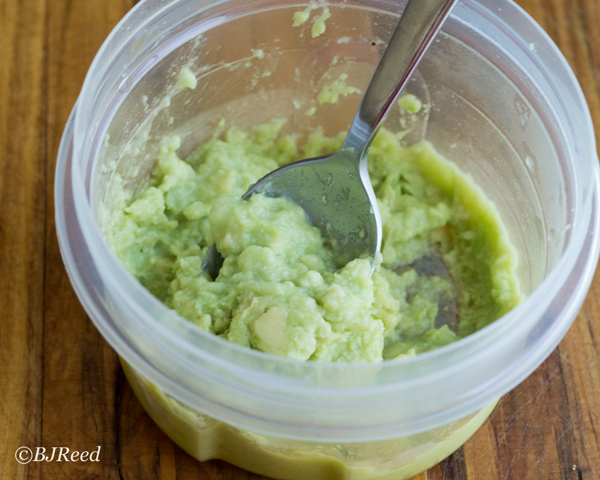
(Case 1): In this example, let’s assume I’m making a simple avocado spread. First I would cut the avocado in half lengthwise, discard the pit, scoop the fruit out of the skin with a spoon, place in a small bowl, add a squeeze of lemon or lime juice over the avocado, then mash with a fork.
If I only use some of the spread I’ll want to reserve the rest…here’s what to do:
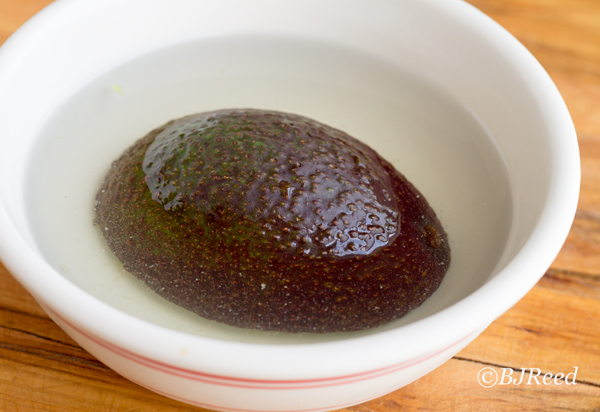
(1) Place the avocado spread in a container (one which can be tightly sealed)
(2) Level the spread (3) Gently pour water over the spread; be sure to cover all of the spread with about 1/2 inch of water to seal it from air exposure (4) Tightly close the container lid (5) Place in refrigerator
Avocado covered with water
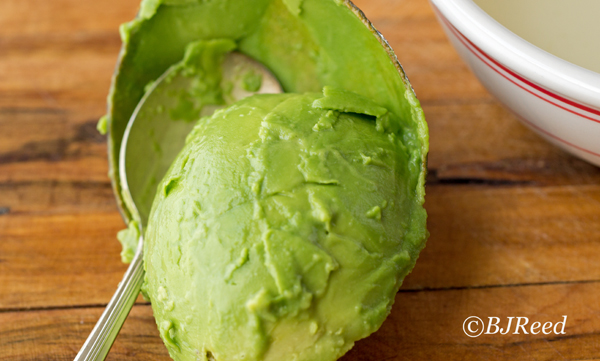
The next day, open the container, pour off the water, stir the avocado spread and there you have it, fresh looking! I tried keeping the spread for two days and it was fine, however I didn’t want to push my luck. Below is the result…FRESH AVOCADO, no brown!
Fresh looking avocado
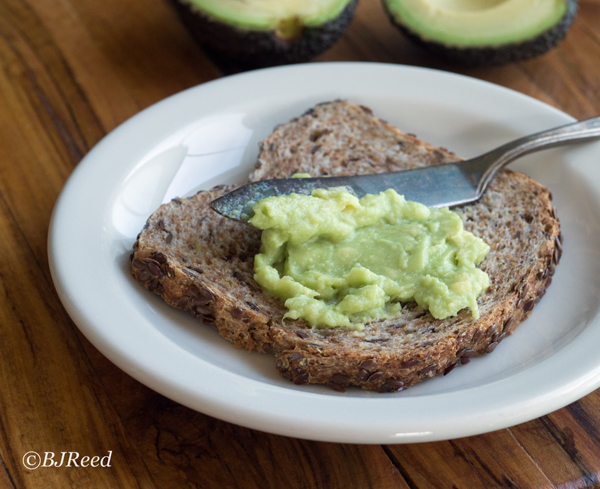
Now go eat that YUMMY avocado spread the second day!!
Yummy avocado spread!
(Case 2): In this example, we have cut the avocado in half lengthwise. We took out the pit, scooped out half of the avocado and slices it for a sandwich. Now what to do with the left over half of the avocado.
Cover the left over half of the Avocado with water
(1) Just take the half, turn it upside down (skin side out) in a bowl.
(2) Cover with water
(3) Place in refrigerator (I’ve only tried it for 24 hours)
(4) When ready to use, drain water
(5) Pat fruit of the avocado dry with a paper towel
(6) Scoop out and slice
After 24 hours preserving in the refrigerator, below is what you have. Better than throwing it away! Let me hear how this method works for you.
Avocado after removing from waterScoop out avocadoSlice Avocado
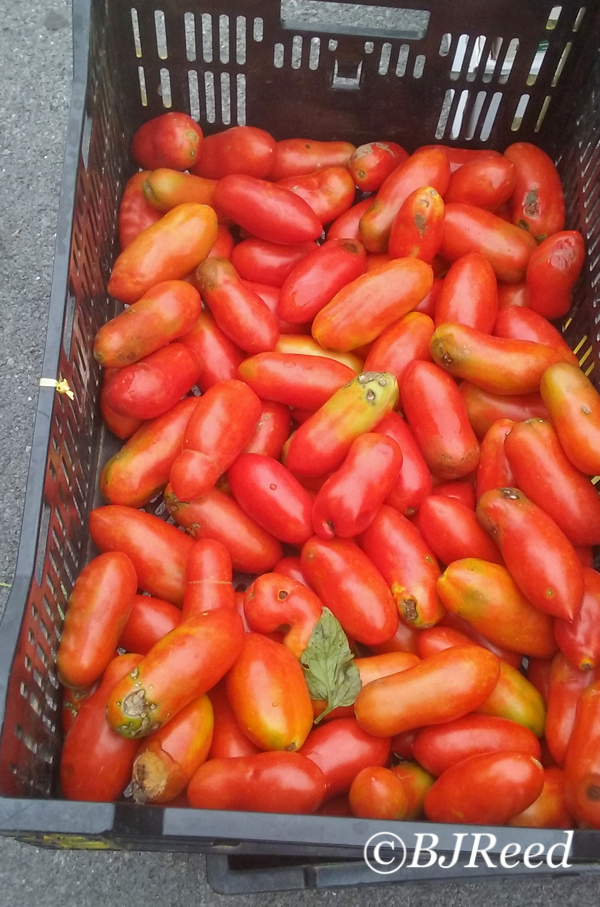
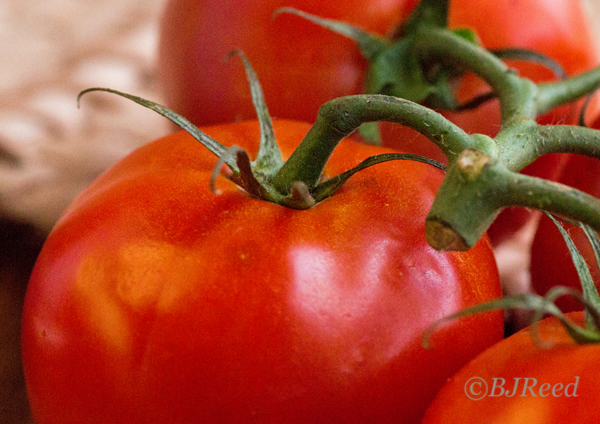
Just call me a tomato snob! I really miss our home-grown heritage tomatoes during the colder months in Pennsylvania. Usually after October any store-bought slicer-type tomatoes are just so dull and not even worth purchasing. Of course you may choose to can tomatoes to savor their fresh taste. But I’ll talking about using tomatoes in sammys and on salads.
So here are two tips around this flavor challenge. If you have more tips, we’d love to hear from you!
(1) We have found that store-bought cherry tomatoes are still rather tasty during this season. We use in salads and in some soups.
Cherry Tomatoes at the Market
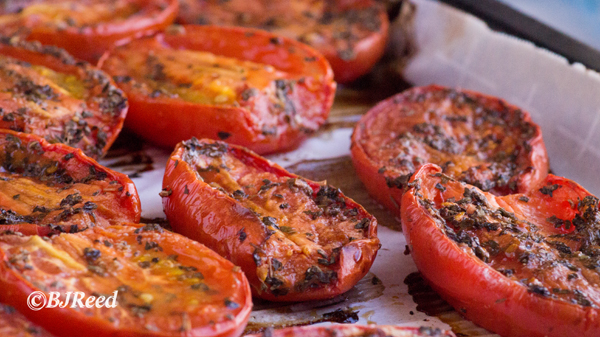
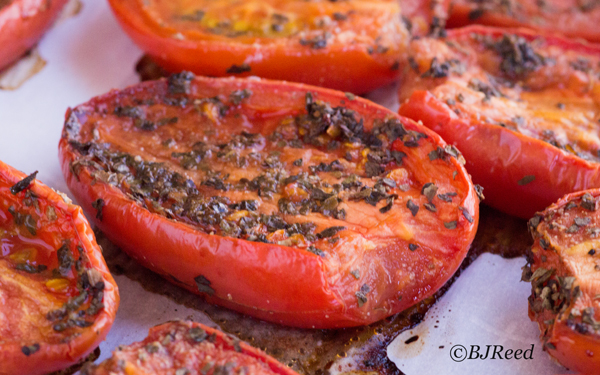
(2) We have found roasting store-bought Italian Plum Tomatoes will get us through the winter. They are inexpensive and accessible but still rather flat tasting during the winter, that is, until roasted. After roasting they are taste busting gems! I roast plum tomatoes in my toaster oven about once a week; wrap left overs in the parchment paper which they were roasted on and store in the refrigerator so they are handy to grab.
Plum tomatoes
HOW TO ROAST TOMATOES TOMATOES (PLUM) – ROASTED: Juicy caramelized tomatoes – use to enhance sauces, in salads, on sandwiches or just pop into your mouth for a tasty nutritious treat. It’s easy to make small batches in a toaster oven. They are particularly yummy in the colder months when store bought tomatoes are so tasteless.
Preheat toaster oven 400°F. Cut fresh tomatoes in half lengthwise, cut out stem. Place halves in a medium sized bowl, pour tablespoons of Balsamic vinegar over the tomatoes. Stir until all surfaces are coated. Sprinkle with dried basil, salt substitute and garlic powder; gently toss. Place halved tomatoes, cut side up, on parchment paper; roast for about 30 minutes.
Nutrition Facts
Calories 26 Calories from Fat 0, Total Fat 0g, Saturated Fat 0g, Cholesterol 0mg, Sodium 9mg, Total Carbohydrate 6g, Fiber 1g, Sugars 1g, Protein 1g
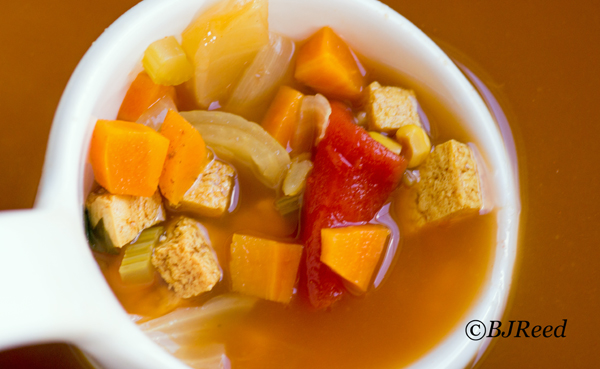
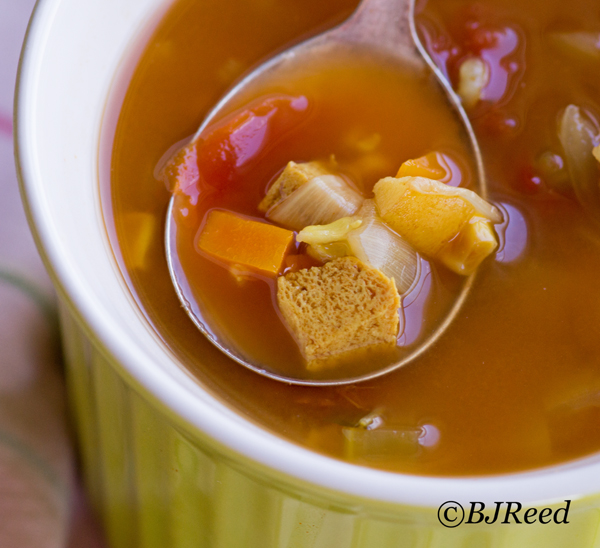
NO-CHICKEN TOMATO RICE SOUP: Terrific looking, delicious, healthy…nutrient packed soup. Note the pieces of tofu, what do you think they look like – right…chicken! We learned this trick from a chef who made a similar type soup, we asked her to share her secret for making tofu with that unique texture. So we are sharing her tip with you. Freezing tofu for 24 hours changes the texture to look similar to cut up cubes of chicken.
Serve this soup to anybody, they won’t know the difference and they’ll love it just like we do. It’s so good for your heart heath!
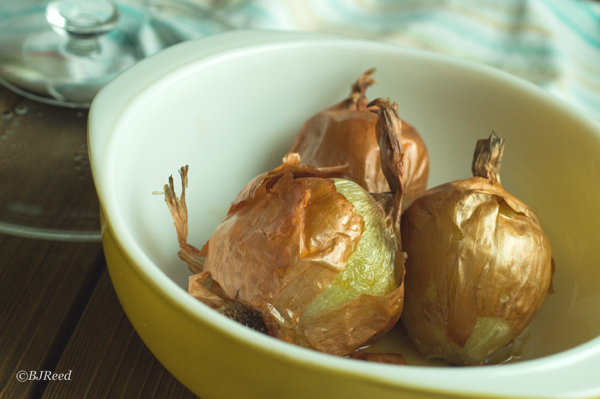
Fresh Home Grown TomatoesRoasted Onions in Microwave
Serves: 10 || Prep Time: 30 minutes || Cook Time: 4 minutes medium pressure or 2 hours on stove
6 cups water (reserve 3 cups to add after cooking if your pressure cooker is 5 quarts or less)
5 cups veggie stock (homemade or commercial no salt added) 1 (14-ounce) package extra firm tofu (prepare a day ahead, freeze first, then drain and press) 2 cloves garlic, minced 3 roasted onions, roasted in microwave, then diced 3 stalks celery, diced 1 (optional) parsnip, diced 2 carrots, diced 1 cup brown rice, rinsed (do not pre-cook) 1/2 cup dried corn 1/4 cup fresh basil, cilantro or parsley, chopped 1 tablespoon chili powder 1 tablespoon poultry seasoning
1 tablespoon dried parsley
1/2 teaspoon cumin
1/2 teaspoon black pepper (or to taste)
1/2 teaspoon paprika
1/2 teaspoon turmeric
1/2 teaspoon salt
2 tablespoons nutritional yeast
1 (14-ounce) can diced or stewed tomatoes or homegrown tomatoes
++++++++++++++++
Freeze extra-firm tofu for 24 hours, thaw then press out water with a tofu press or between paper towels. Dice tofu into small cubes about 1/4″. In the meantime roast onions in a microwave; that is, place whole onions with skins into a covered microwaveable container in a microwave and roast for 6 minutes (otherwise, roast onions ahead of time in the oven). Cool onions, peel skins then chop onion into small 1″ pieces. Prepare vegetables.
Pressure cooker: Place all ingredients into the pressure cooker. Cook on medium pressure for 4 minutes. Take off the hot burner, let rest for 10 minutes then release pressure. Add the reserved water or more for desired consistency.
Stovetop: Prepare vegetables. Place all ingredients into a large soup pot, bring to a boil then simmer for 2 hours; occasionally stir.
Serve over your favorite leafy greens.
Cup No-chicken Tomato Rice Soup
Nutrition Facts
Calories 173 Calories from Fat 16, Total Fat 2g, Saturated Fat 0g, Cholesterol 0mg, Sodium 179mg, Total Carbohydrate 26g, Fiber 5g, Sugars 3g, Protein 9g
Make Life Easy – Using a tofu press to press out excess liquid from tofu makes your life so easy!
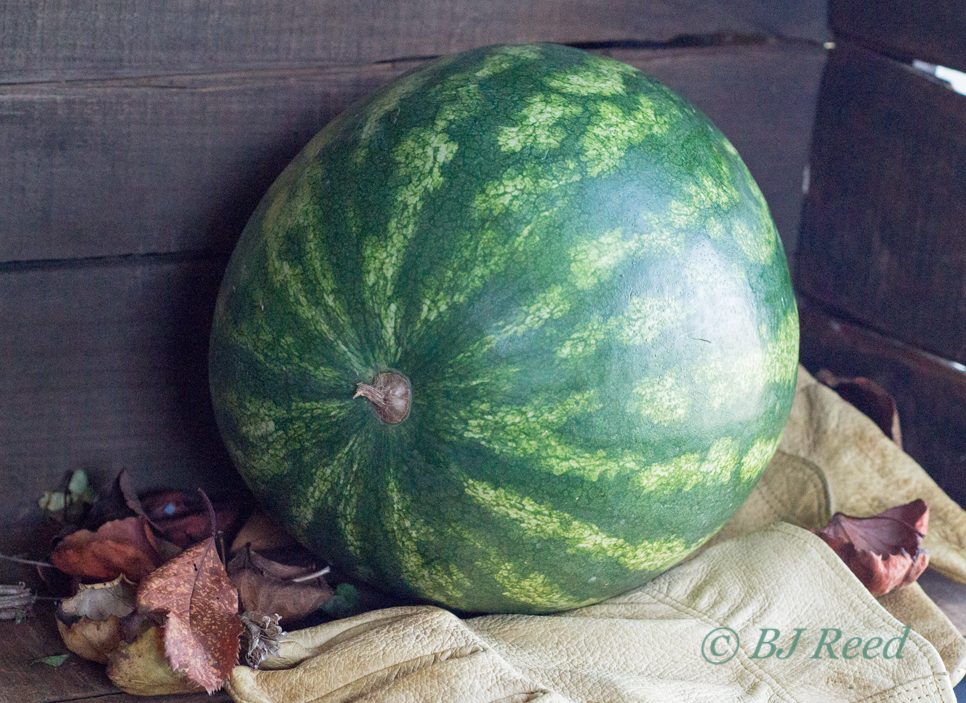
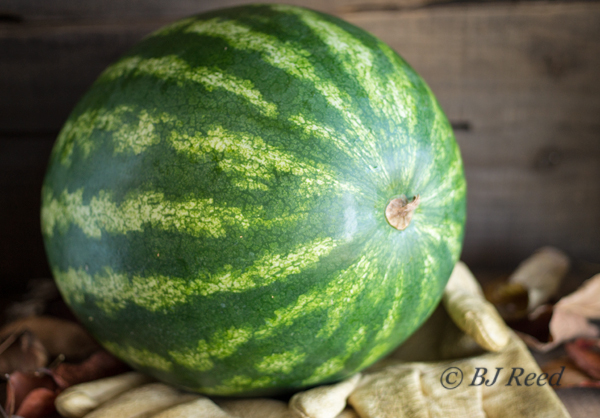
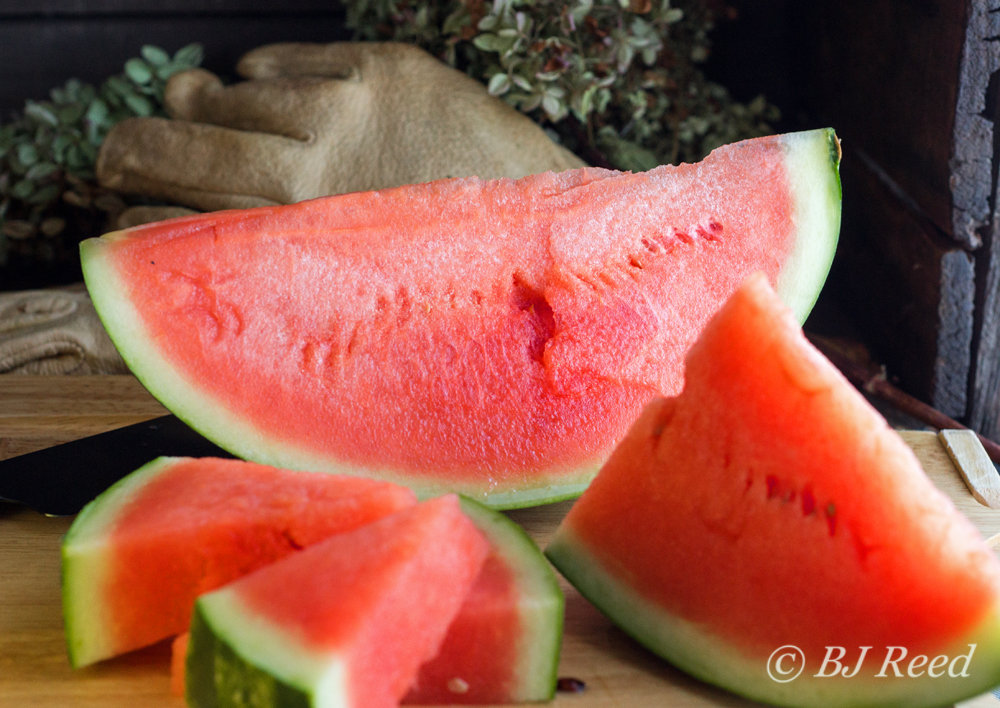
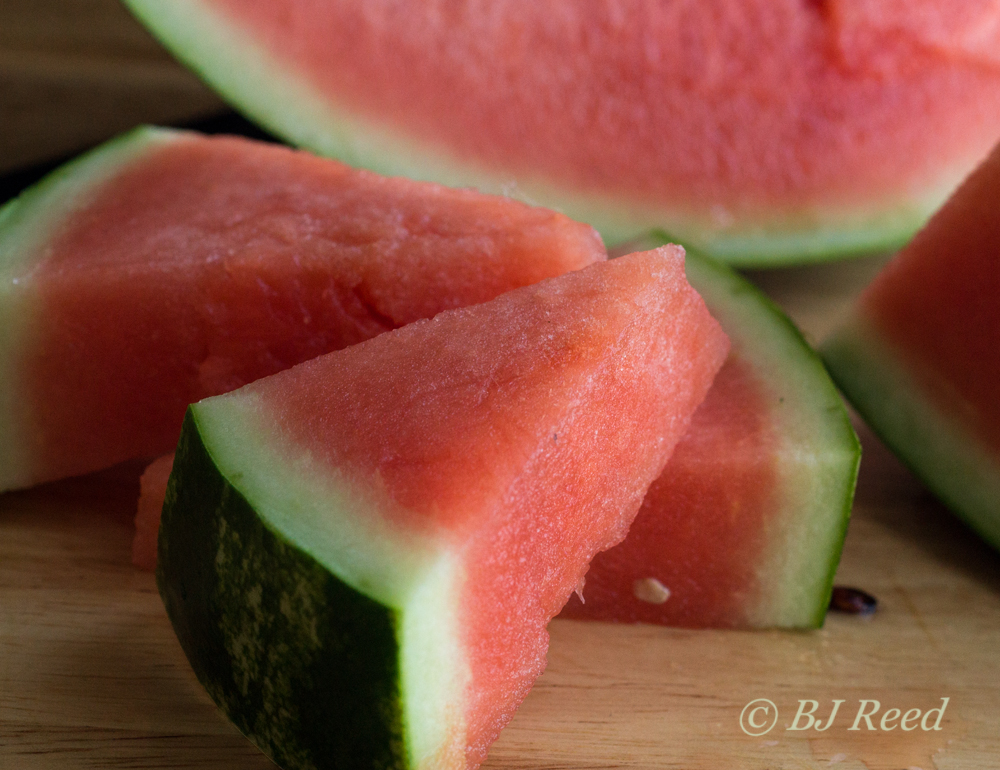
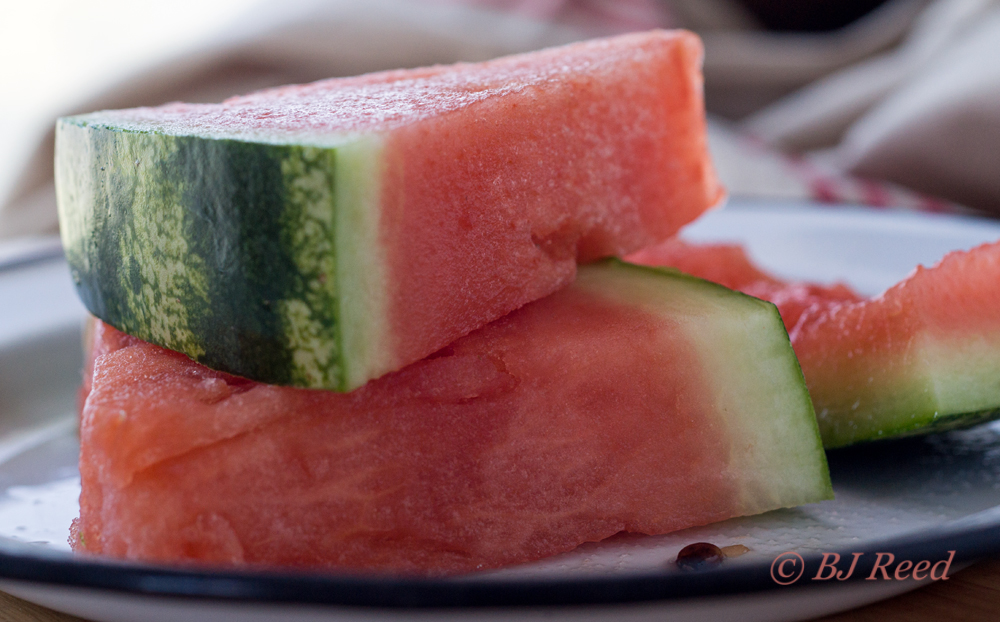
Life moves along so quickly these days…a hot summer turns into a colorful autumn. It is October but today we ate the last piece of local summer’s watermelon, we extended the summer with this last piece of sweet summer. We will soon be moving onto this season’s beautiful food from the fertile Franklin County valley in PA.
We have learned how to pick ripe watermelons while gleaning for The Gleaning Project of South Central PA. Consumer’s demand in our area is for seedless watermelons, hence that’s what growers grow. The rounder ones (female) are the ones we gathered during our field time, on the other hand, the larger oblong seeded-watermelons (males) are needed to fertilize, so we also gathered those.
It’s always a good exercise day when we are gleaning watermelons, when gleaners arrive on the site they stretch before lifting and are warned – safety first. Thus we do a lot of safe bending, twisting and lifting in the fields. Enjoying nature, exercising and gathering food for the less fortunate is truly a breath of FRESH air! Support our growers by purchasing local vegetables and fruits.
Gleaning WatermelonBeautiful Sweet WatermelonThe Last Watermelon of the Season – Grown Locally
So today we cut open our last local watermelon. And BOY was it sweet and delicious! Enjoy each season.
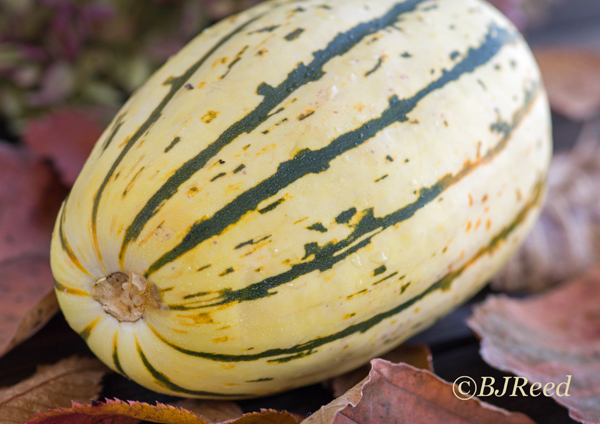
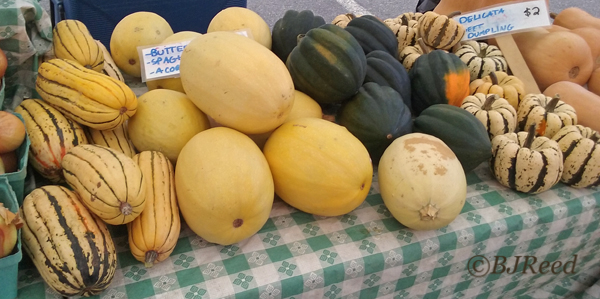
Fresh Winter squash are showing their faces at farmer’s markets, vegetable stands and grocery stores in the area. It’s that time of year. I’m in heaven – Delicata Squash! Just to hold them in the palm of my hand is exciting, just my size. This gem is characterized by a cream colored delicate rind with green stripes.
There are so many varieties of winter squash to pick from, but, so far, Delicata has become my overall favorite! Why, you ask? Well let’s see: Foremost, they are so easy to prepare, my favorite method is roasting; you can eat the “delicate” skin, no peeling, yipee; when roasting they become caramelized, so creamy and naturally sweet but not too sweet; they have a somewhat nutty flavor too; perfect size for a single serving (about 6-7 inches long) and they fit perfectly into my energy-efficient toaster oven; the green striped skin is just beautiful, with golden-orange colored flesh; this delicate squash could easily be eaten as a dessert, it’s that tasty…need I say more.
Various Winter Squash at the Market- DELICATA on the far left.
Now don’t get me wrong, I love many types of winter squash, they each have their own attributes and purposes. But today it’s time to roast a Delicata. Perhaps another day I’ll cover other preparation methods.
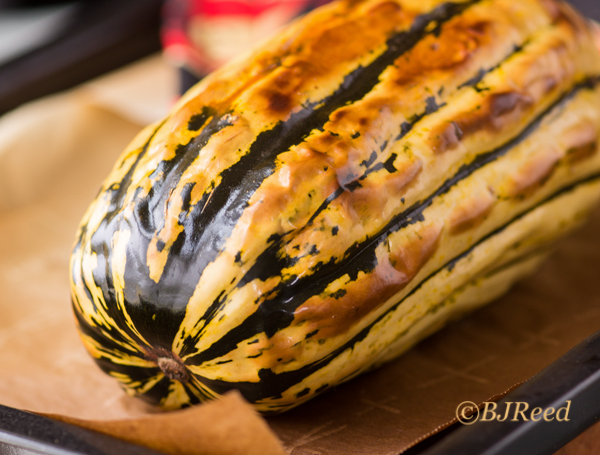
I’m going to use it as a single serving for my lunch. So here’s the simple roasting process for a Delicata Squash:
Preheat toaster oven for 5 minutes 395 degrees Fahrenheit
Scrub squash
Place parchment paper on the oven tray
Place Delicata squash on the parchment paper
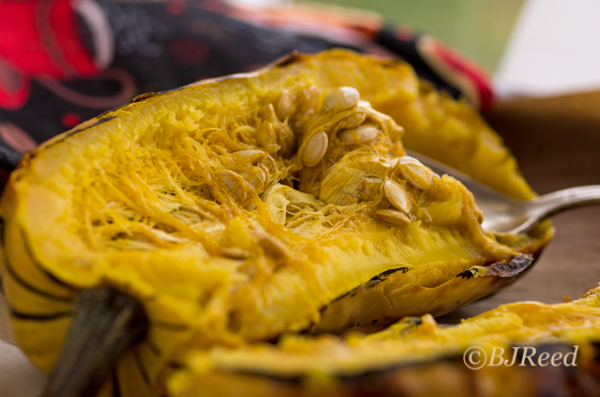
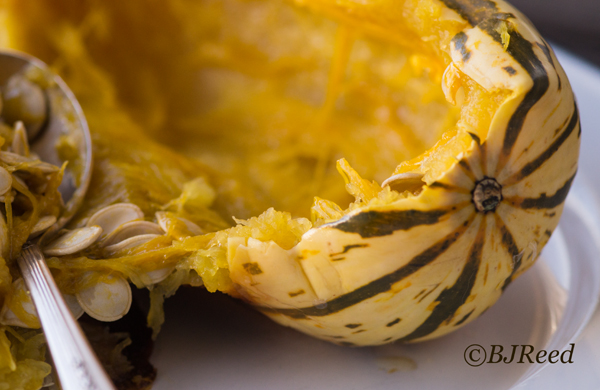
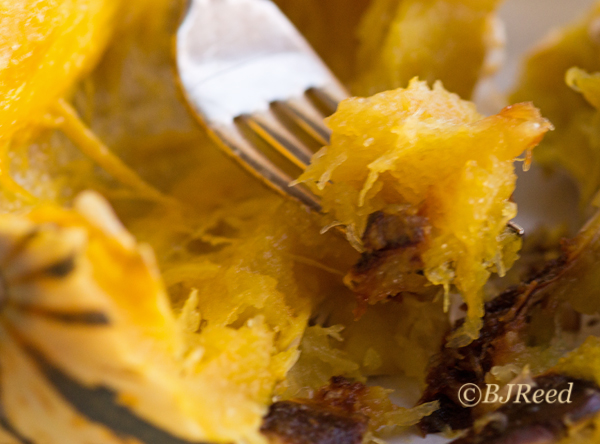
Roast for 20-25 minutes or to your liking, turn mid-way. (I love to eat the brown crusty portion of the roasted skin.)
Cool, cut in half, scoop out seeds and stringy flesh (seeds can be roasted too but that’s another post)
That’s it, eat flesh and skin – DELICIOUS
Roasted DelicataDelicata Squash – cut in half after roastingScoop out seedsEat flesh and skin of the Delicata Squash